Using Simple Burp Macros to Automate Testing
Recently, while assessing a web application I noticed content on one of the pages that appeared to be derived from sensitive information stored within the site’s user profiles. To evaluate this functionality and illustrate the potential for sensitive information leakage I needed to:
- Enumerate the values on my profile page to create a concrete association between the sensitive and derived values.
- Collect and map the sensitive information within the public user profile directory to show that a direct correlation could be easily made
During testing, I tried to assess the functionality using the default capabilities of Burp Intruder but because of the way the changes were being reflected I couldn’t easily enumerate the values. This was largely due to the relationship between the profile update page and the content page. When the profile was updated the content would be displayed in a totally separate part of the application. By default, Burp Intruder will alter content in identified positions in a request and analyze the resulting response, optionally following a redirect when instructed to do so. This wasn’t going to be enough to collect the information I was targeting. In hindsight, I could have accomplished this task by scripting the request, response, and redirect outside of Burp. However, I was determined to figure out how I could replicate this functionality with the web application tester’s tool of choice. Anyway, why NOT learn how to use the tools you have available to you in a more effective manner.
Enter the Burp Macro feature.
Burp Macros allow you to arbitrarily perform a set of actions based on a Session Handling Rule that can be tied to any of the other integrated tools that Burp boasts. In this case, we want to:
- Submit a request from Burp Intruder to update the user’s profile
- Check to make sure that the update results in an HTTP 200 status code
- Perform a subsequent request to the target page with the derived content
- Send the resulting response to Burp Intruder
- Analyze the results extracting the target information from the page
This same scenario could be applied to other operations like discovery of stored cross-site scripting vulnerabilities (XSS). Extending the functionality, macros have the ability to transform response data generated as a result of a request which could prove useful in analyzing multi-step functionality such as site registration features.
To illustrate the concept, a simple site has been mocked up to include equivalent functionality. A user profile edit page is used to submit the user’s birthday to the application. A corresponding user profile view page is used to display the derived information. Both pages can be seen in the graphics below.

User Profile Update Page

User Profile View Page
We will use the Burp Macro feature to resolve this derived information to the sensitive information in the user’s profile. To find the macro feature of Burp, you need to navigate to the Options tab then select the Sessions tab.

Burp macro functionality is found under Options > Session.
The resulting form includes two features that we’ll be using to extract the information we want. First, we need to define a macro that will process our form submissions and cause the subsequent request to be fired. Second, we need to define a session handling rule to cause the macro to fire based on our Burp Intruder Attack.
To add the macro, scroll to the bottom of the form and click the Add button in the Macro dialog to add a new macro.

Adding a Burp Macro.
The history window will appear so an appropriate request can be selected. The selected request will fire each time the macro is executed. For our sample site, when a profile update is fired by Burp Intruder we wish to fetch the profile view page and analyze the response. Therefore, we select a call to the ProfileView.aspx page.

Burp Macro Request Selection
With this simple example, that’s all we really need to do besides naming our macro. The completed macro form can be seen below. Provide a description and click OK to complete the process.

Completed Burp Macro Form
Note: The macro properties can include multiple requests and responses which pass parameters from one form to the next and perform intermediate transformations. This can be useful in completing multi-step processes where you may only want to inject content on the first form and derive responses based on intermediate responses.
Now that our macro is complete we need to create a session rule to execute the macro when it sees a request that matches our criteria. At the top of the Options > Sessions page we can find the Session Handling Rules dialogue box. Click Add to create a new Session Handling Rule.

Above: Adding a Session Handling Rule.
The Session Handling Rule Editor will appear and the Details tab will be selected by default. Give the handling rule a name and begin adding rule actions.

Session Handling Rule Editor
Multiple rules can be added to perform several actions in sequence. For our purposes, we only want to execute our macro and we want to do so after our Burp Intruder request has been processed. Click the Add button and select the “Run a post-request macro” option.

Adding a Post-Request Macro
The Session Handling Action Editor dialog will appear. Select the macro that you created to launch the target page, deselect the “Update the first macro….” Option, and ensure that the option “The final response from the macro” is selected under “Pass back to the invoking tool.” Since we are not processing any parameters in our macro this is unnecessary.

Selecting Session Handling Actions
Click OK to save the Rule Action and then select the Scope tab of the Session Handling Rule Editor dialog. This allows us to specify the tools, URLs, and parameters to which this Session Handling Rule applies. For this example, we will only be using Burp Intruder so we can safely deselect the other tools. We set the URL Scope to the suite scope (we should have already restricted our scope to the target site). Finally, we don’t need to specify parameter scope since we’ll be processing specific parameters with Burp Intruder. Click OK to save this Session Handling Rule and our macro setup is complete.

Setting Session Handling Scope
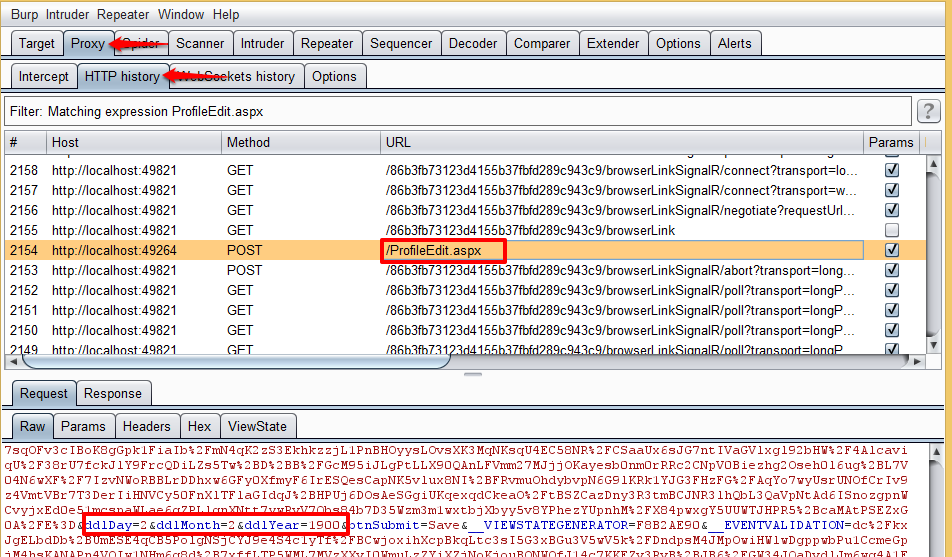
With the session handling rule and macro complete, we can test our configuration out using Burp Intruder. First, select the Proxy > HTTP History tab to select the base request that we want to manipulate. On our example site, we’re looking for the ProfileEdit.aspx page with post parameters included. Within the request we should see the parameters that we wish to manipulate (ddlDay, ddlMonth, and ddlYear).

Selecting the Target Request
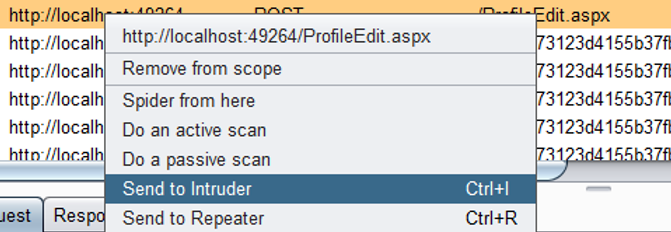
Once an acceptable request has been identified, send the entry to Burp Intruder. Simply right-click on the item and select the “Send to Intruder” option.

Send Request to Intruder
Select the Intruder > Positions tab to configure the appropriate payload positions. Ensure that only the parameters that Intruder will manipulate are selected. For this example, only the day and month columns are significant in producing unique output. Since there are multiple payload positions and multiple payload lengths, we need to select the Cluster Bomb attack type. Cluster Bomb accepts multiple payloads and will iterate through all permutations of the payload combinations. Since we want multiple payloads we cannot select the Sniper or Battering Ram attacks. Likewise, since there isn’t a one-to-one relationship between day and month we shouldn’t select Pitchfork. The completed payload positions form can be seen below.

Intruder Cluster Bomb Attack Setup
With appropriate payload positions selected, the actual payloads must be defined. In this case, we need simple integers to represent the day and month respectively. Setup for each payload position can be seen below. We aren’t concerned with error handling for varying numbers of days in the month. We will simply ignore any error output from the application.

Payload Setup for Day of Month

Payload Setup for Month of Year
Finally, we can finish our attack setup by setting up Burp Intruder’s options. Since each of these requests must be completed sequentially, we cannot take advantage of multi-threading. This means that Number of Threads must be adjusted to be one.

Intruder Attack Options Request Engine Settings
We also want to see our enumerated values in the results pane. As a result, we need to set up a Grep – Extract rule. Select the “Extract the following items from responses” check box and click the Add button to add an extract rule.

Add Grep – Extract Rule
This step is somewhat tricky. Burp Intruder expects that we’ll find the content we wish to extract within the response that was forwarded with the request that we are manipulating. As a result of our macro we will receive a completely different response. Therefore, we can’t use the built-in tools for identifying the extract location. It helps to either have the HTTP History or another Intruder session with our profile view request loaded.
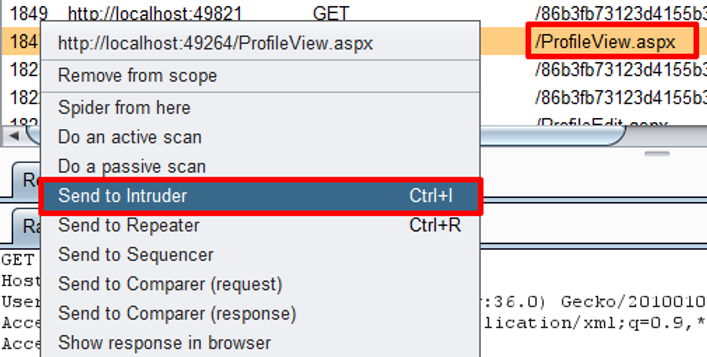
Return to the Proxy > HTTP History tab a send one of the requests for ProfileView.aspx to Burp Intruder.

Send ProfileVeiw.aspx Request to Intruder
Once this request has been sent to Intruder, select the Intruder > Options tab, scroll down to Grep – Extract option, and click the Add button. Now, we are working with the request we expect to receive in our original Intruder Attack. Select the text you are interested in matching (in this case it could be the color identified in the text or in the inline style). Burp will create unique matching expressions for finding this text location. Copy each expression out to a text file so that it can be input into the correct Grep – Extract form. The Grep – Extract form from ProfileView.aspx and the completed Grep – Extract form from our real attack can both be seen below.

Source Grep – Extract Form

Target Grep – Extract Form
All of the other Burp Intruder options can be left with their default values. Now, with our setup complete, the only thing left to do is launch our attack. Click the Start Attack button and observe the details in the Intruder Attack window. The output below identifies the day of the month (Payload1), month of the year (Payload2), and corresponding value (“lblColorName”>). This data can now be used as a lookup table by using the Save > Results Table option.

Enumerated Sensitive Data Relationship
Using another Intruder Attack, the public profiles of site users can be viewed and a subsequent Grep – Match or Grep – Extract can be used to identify the day and month of their birthday.
Hopefully, this post has illustrated the simple power of the Burp Macro. While this example could have been executed equally well using a script, we now have the benefit of a Burp State file to accompany our methodology description. In addition, this introduction to Burp Macros should get you thinking about how this feature can be used to perform more advanced attacks that involve passing parameters from one stage to the next.
Ready to learn more?
Level up your skills with affordable classes from Antisyphon!
Available live/virtual and on-demand


Robert Smith
December 22, 2016 @ 9:16 pm
Thank you, sir. This is extremely useful.