Finding Access Control Vulnerabilities with Autorize

In the most recent revision of the OWASP Top 10, Broken Access Controls leapt from fifth to first.1

OWASP describes an access control as something that “enforces policy such that users cannot act outside of their intended permissions.” So, whenever we find that we can do something in a web application that we should not be allowed to do with our current permissions, then we have found an access control vulnerability. In addition to being common, access control vulnerabilities are often high impact when exploited.
Access control vulnerabilities can manifest in several different ways. For now, we’ll focus on the two types you are most likely to see in the wild: vertical access control vulnerabilities and horizontal access control vulnerabilities. Vertical access control vulnerabilities occur when an application has distinct privilege levels but does not correctly enforce access control across these privilege levels. For example, an application that has both regular users and higher-privileged administrative users should restrict regular users from performing actions reserved for administrative users. If the application does not prevent regular users from performing these privileged administrative actions, then that would be a vertical access control vulnerability. Horizontal access control vulnerabilities occur when users have equal privileges but are restricted to a subset of access/actions. For example, a self-service medical application that allows patients to log in and view their personal medical information should restrict users from accessing the data of other patients.
Before we dive into looking for access control vulnerabilities with Autorize, let’s do some setup. We want to be able to interact with the target application from multiple authentication contexts simultaneously, so we need to be able to log into the application with different user accounts at the same time. My preferred method of doing this is to run Firefox with the –no-remote and –p flags.

The –no-remote flag2 tells Firefox to start a new instance and not to talk to any other existing instances. The -p flag tells Firefox to allow you to select a profile.
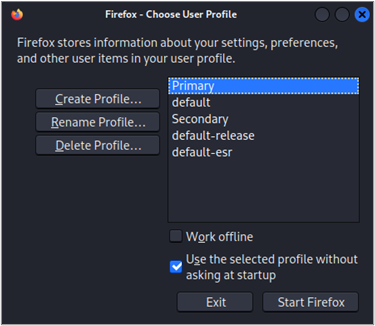
I have created two profiles for penetration testing web applications: “Primary” and “Secondary”. These profiles are customized with useful extensions, UI modifications for quality screenshots, and some configurations3 (courtesy of Brian “BB” King) that quiet down some of the background noise Firefox typically makes. Once we’ve launched two separate instances of Firefox with two different profiles and configured them to proxy requests through Burp Suite, we are ready to start up Burp Suite and configure Autorize.
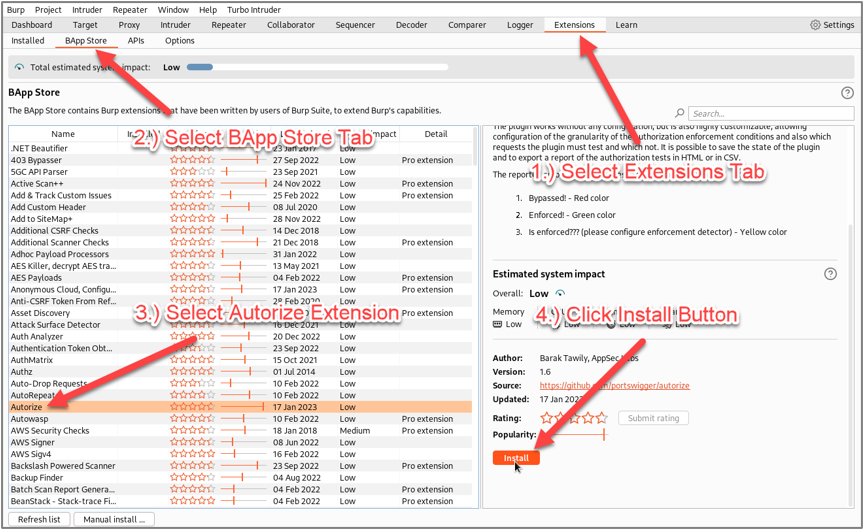
To install Autorize, you will need to select the “Extensions” tab in the top of Burp Suite, then select the “BApp Store” tab, and scroll down to the Autorize extension, and click the “Install” button. Fortunately, Burp Suite Pro is not required, and Autorize can be used with Burp’s free Community Edition.
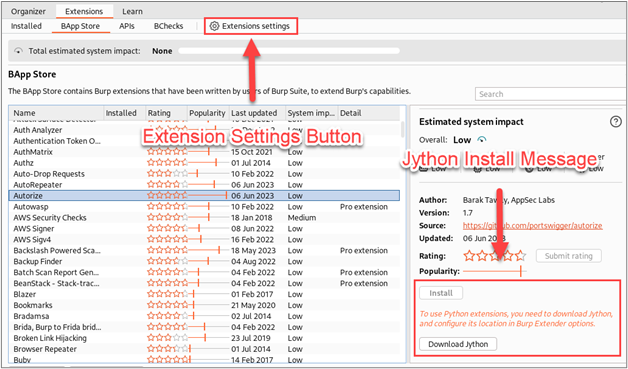
If you have not been using other Burp Suite extensions that leverage Python, you will likely see a message indicating that you need to download and configure Jython. To install the extension, you’ll need to download the Jython standalone JAR file.4 Once you’ve downloaded the Jython standalone JAR, you’ll need to configure its location in Burp Suite by opening the “Extensions settings” interface.
Once you’ve opened the extensions settings interface, browse to the “Python environment” section and configure the location of your Jython standalone JAR.
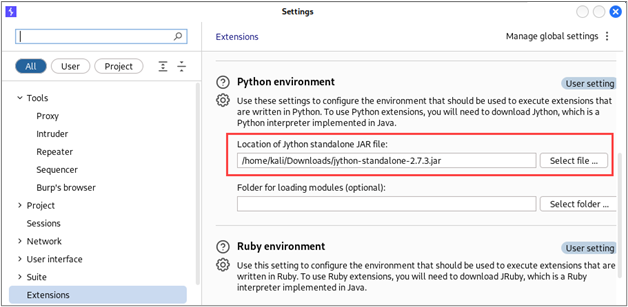
Once you have pointed Burp Suite to the Jython standalone JAR, you should be able to install Autorize.
Next, I started an instance of OWASP’s intentionally vulnerable Juice Shop5 application on my test host and browsed to it in both of my web browsers.
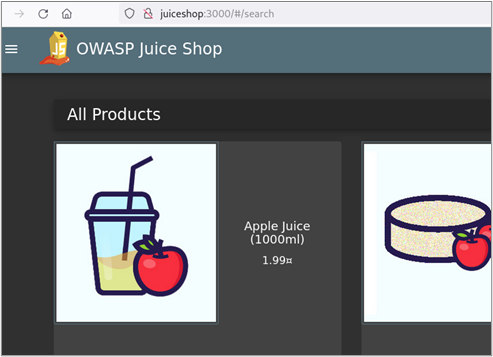
In order to test access controls from different contexts, we must first identify how the application manages sessions and controls access in response to privileged requests. I like to start by authenticating to the application with test credentials and observing how the application responds. Typically, an application will issue session tokens in response to a successful authentication request. These values can be set as cookies or in the body of the response. Often times, multiple values will be returned. First, I browse to the login page for the Juice Shop app and authenticate with the administrator credentials.
SPOILER ALERT! If you want to follow along on your own, these are the credentials for the respective Juice Shop accounts we will use in this blog post:
- Username: admin@juice-sh.op Password: admin123
- Username: mc.safesearch@juice-sh.op Password: Mr. N00dles
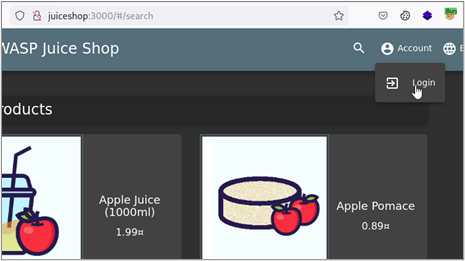
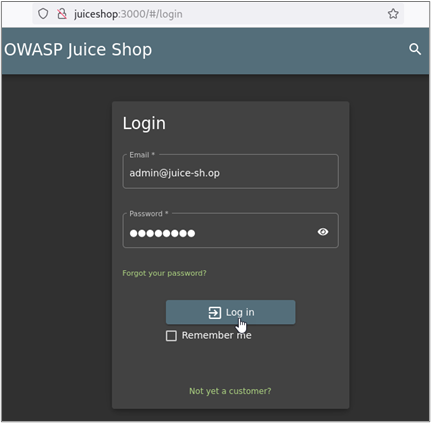
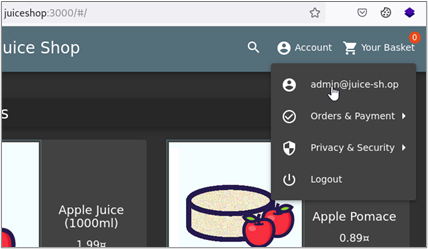
Once we’ve authenticated, we’ll want to review the response from the application in Burp Suite. In the case of Juice Shop, the application did not set any cookies, but it did return JSON content. Part of this JSON content was a property called “token” with a value that appeared to be a JSON Web Token (JWT).6

We won’t dig too deep into JWTs in this blog post, but BB King has an excellent webcast7 if you would like to know more about how they work. The point here is that this JWT value is the only thing in the response that looks like it could possibly be used for session management and access control, so let’s move on from there. The next thing we want to do is confirm that this value is being used for session management by making a privileged request with our newly authenticated session. What constitutes a privileged request will vary from application to application, but the ability to modify an authenticated user’s own account is usually a safe bet. So, the next thing I’ll do is navigate to the authenticated user’s account settings and upload a new profile picture.
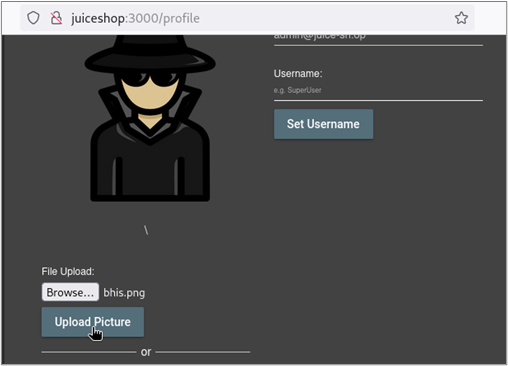
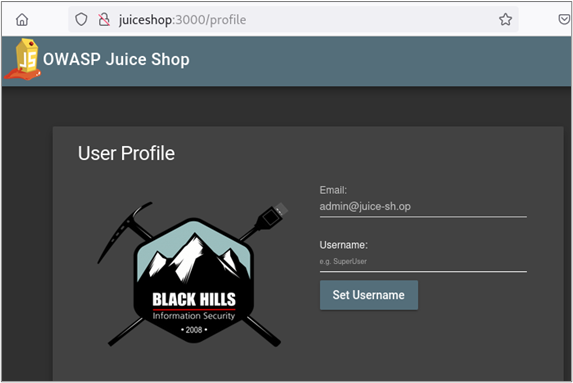
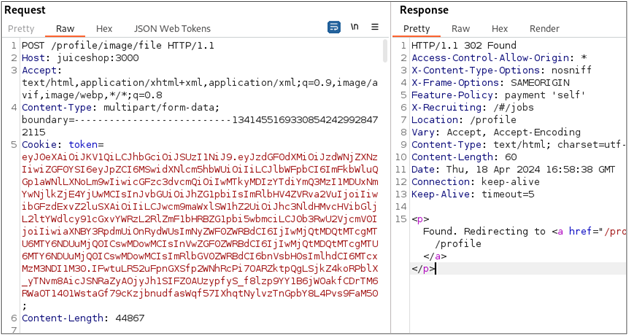
When we examine the upload request in Burp Suite, we can see that it contained our JWT along with some other cookies.
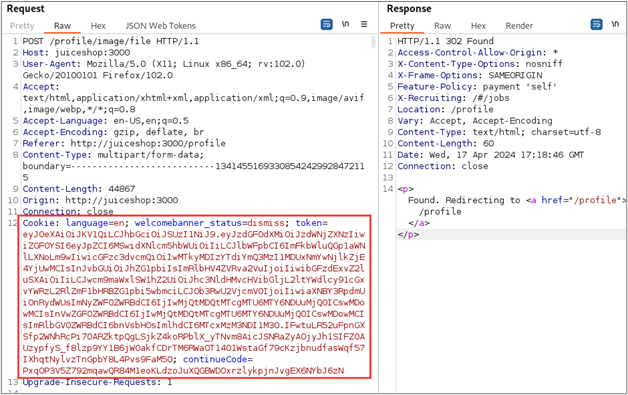
Next, we’ll send this request to Burp Suite’s Repeater to identify exactly which cookies are required to successfully make the privileged request. First, replay the request to ensure that it succeeds as expected. Next, I like to remove all of the cookies to get an idea of what a failed request looks like. With Juice Shop, we can see that the application responds with an HTTP 500 Internal Server Error with a message in the body that indicates “illegal activity” was blocked.
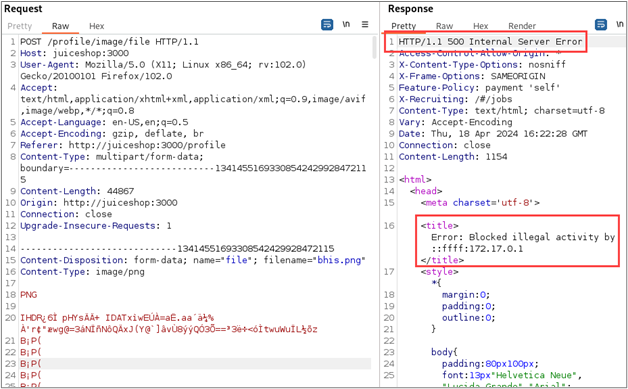
Next, we can replay the original request, removing cookies one by one until we are left with only the tokens required for the request to succeed. For applications that submit a lot of extra cookies, you can use the Request Minimizer8 extension to help trim things down. As you might have expected, only our “token” JWT is required.
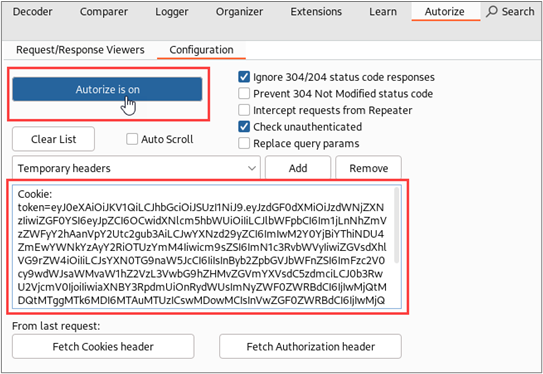
Now we’re finally ready to start testing access controls with Autorize. We will log into Juice Shop in our second browser with the lower-privilege mc.safesearch@juice-sh.op account. Once authenticated, we will paste the JWT for this account’s session into the Autorize configuration interface and enable Autorize.
Next, we just need to browse the application with the high-privilege account. For each request made in our browser with the high-privilege account, Autorize will make two additional requests. One of these requests will use the session token of our low-privilege account, and the second request will be made in an unauthenticated context. Autorize compares the responses to each request and tries to determine if access controls have been enforced correctly. The results are displayed in a table on the left side of the Autorize tab.
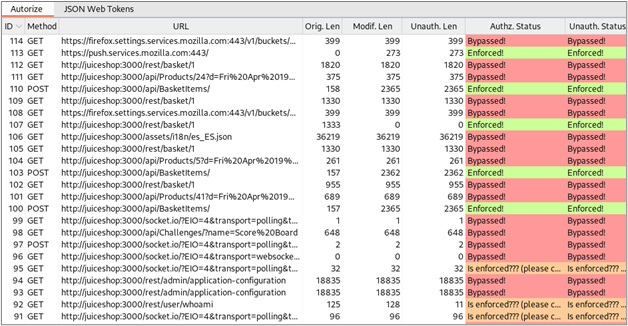
Reviewing the Autorize results, we can see three categories of results for a given request:
- Enforced! – Autorize thinks that access controls for this request have been enforced correctly.
- Bypassed! – Autorize thinks that access controls for this request have not been enforced correctly.
- Is Enforced??? – The response to a request differed from the response of the original request, but Autorize is not sure if access controls have been enforced.
Manual review of the Autorize results is necessary because the context of the request and the content of the responses determines if access controls have been applied or if they even should be applied. Let’s look at some examples. First, let’s consider a GET request for a “Products” API method that appears to have allowed both the low-privilege user and the unauthenticated user to bypass access controls.

Once we’ve selected a row in the results table, we can review the details of all three requests and their responses on the right side of the Autorize interface.
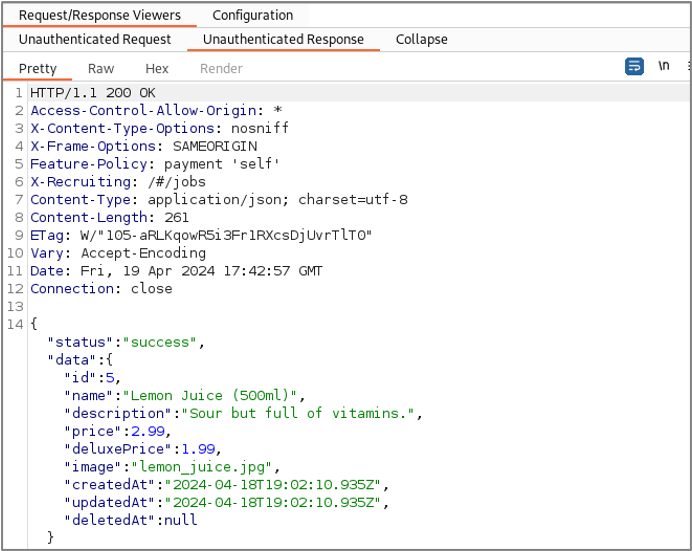
For the request we’ve selected, we find that all three responses are identical. The responses all contained details about a product that is for sale within the application. The ability for unauthenticated users to browse the products for sale in the application is almost certainly the desired behavior, so this does not constitute an access control vulnerability.
Next, let’s consider a request to a “whoami” API method that Autorize seems to be confused about.

The responses to these requests were all different, but the content of the responses was appropriate for the authentication context of each request. That is, for the modified request, the application returned identity information about the low-privilege user, and no identity information was returned in the response to the unauthenticated request.
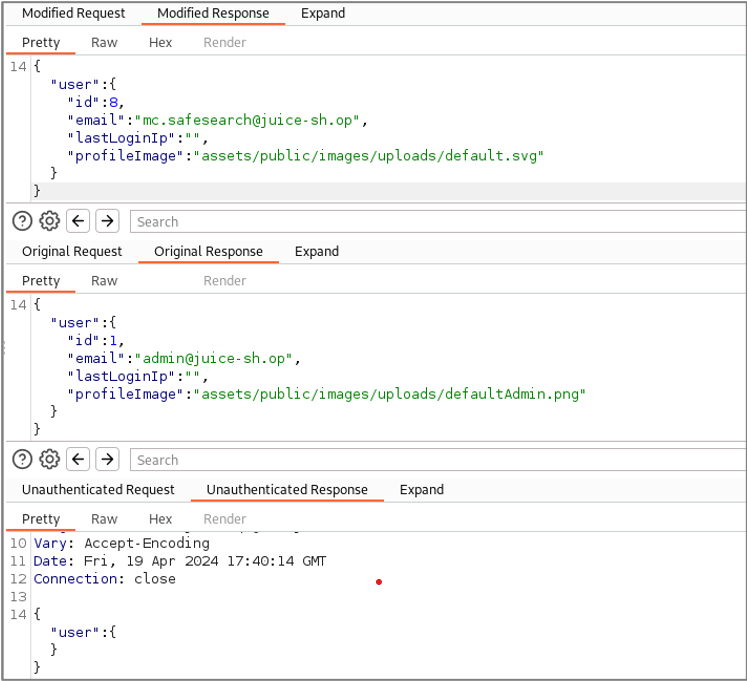
Because the content of the responses was appropriate for the authentication context of each request, this did not constitute an access control vulnerability.
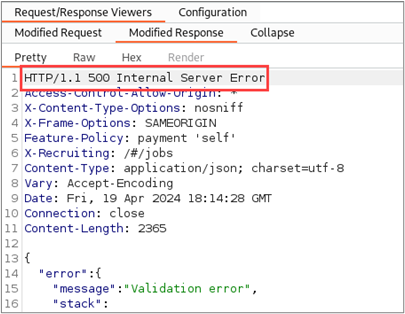
Next, let’s consider a POST request that is made when adding a product to our basket for purchase. Autorize reported that access controls were correctly enforced for this request.

Reviewing the responses, we find that the original request was successful.
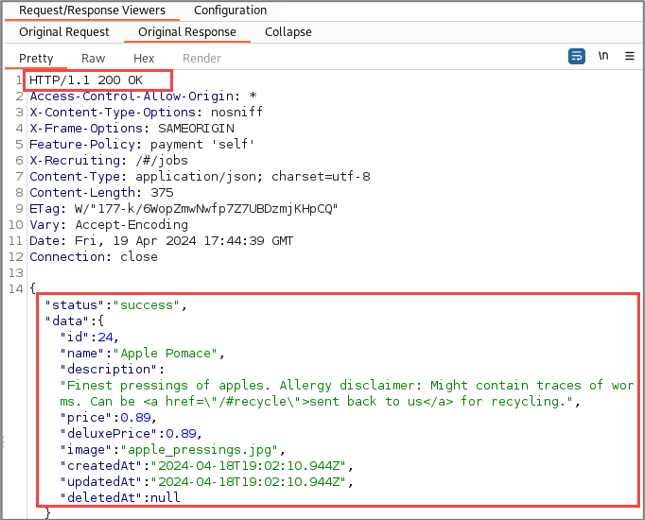
We find that the modified request and unauthenticated request resulted in error responses. While there are some other interesting things about these error responses, they do not constitute an access control vulnerability.
Finally, let’s examine a request to view the contents of the high-privileged user’s basket after adding several items.

Retrieving the contents of an authenticated user’s shopping basket would be considered a privileged request, so this is promising. When we review the response to the original request, we find that the contents of the high-privileged user’s basket are in the response.
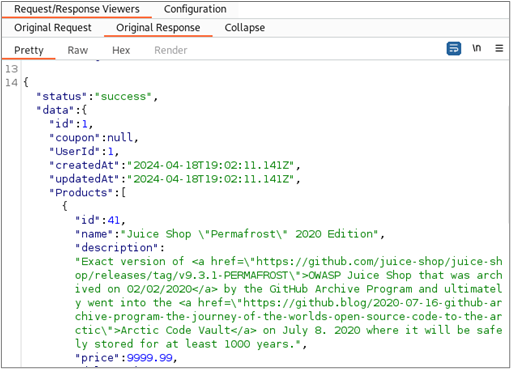
Reviewing the responses to the low-privileged request and the unauthenticated request, we find that the application also returned the high-privilege account’s basket contents in these responses.
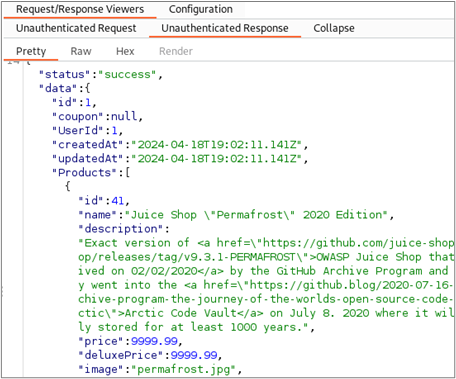
Further investigation into this behavior reveals that individual shopping baskets are indexed by the number at the end of the URL of the request. By changing this number, we can access the contents of different users’ baskets. The following screenshots show how we can retrieve the contents of baskets associated with different users by modifying this value.
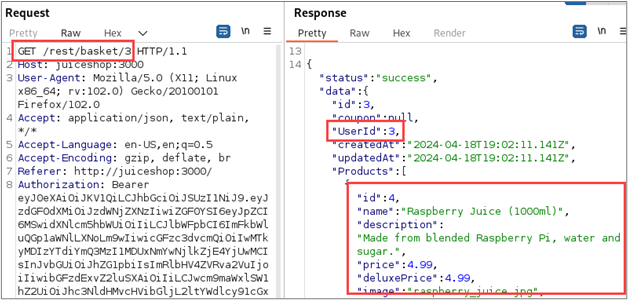
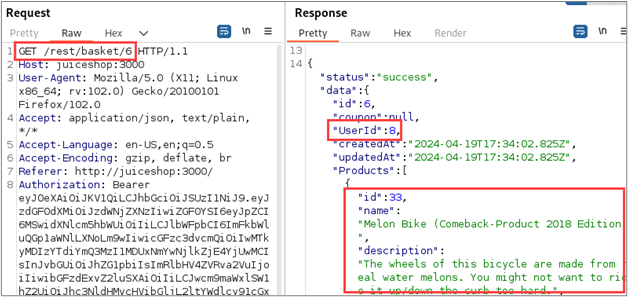
This behavior shows that the application is affected by an access control vulnerability known as an Insecure Direct Object Reference (IDOR).9 The wide-spread existence and potential impact of access control vulnerabilities means that we should give special attention to such conditions when performing web application penetration tests. Hopefully this article has been helpful in demonstrating how to use Autorize to more effectively identify these vulnerabilities.
Footnotes
- https://owasp.org/www-project-top-ten/ ↩︎
- https://www.brycevandyk.com/dissecting-firefoxs-no-remote-option/ ↩︎
- https://www.blackhillsinfosec.com/towards-quieter-firefox/ ↩︎
- https://www.jython.org/download.html ↩︎
- https://owasp.org/www-project-juice-shop/ ↩︎
- https://jwt.io/ ↩︎
- https://www.blackhillsinfosec.com/webcast-modern-webapp-pentesting-how-to-attack-a-jwt/ ↩︎
- https://portswigger.net/bappstore/cc16f37549ff416b990d4312490f5fd1 ↩︎
- https://www.blackhillsinfosec.com/revisiting-insecure-direct-object-reference-idor/ ↩︎

